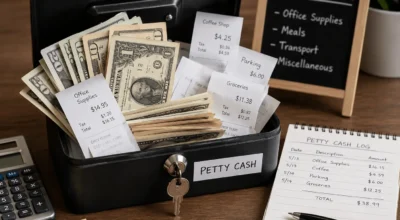
Counting a cash drawer accurately is one of the most fundamental skills in retail. Whether you are opening a register at the start of a shift or closing it out at the end, a correct cash count tells you exactly how much money you started with, how much should be there based on your sales, and whether everything adds up.
In this guide, we walk through the complete process for counting a cash drawer — from sorting bills to reconciling your closing total — along with tips for handling discrepancies and keeping your count consistent every shift.
What You Will Need Before You Start
- All bills and coins currently in the cash drawer
- A flat, clean surface with good lighting
- Your POS closing report or expected sales total (for the closing count)
- A count sheet — use our free online tool or a printed form
Before you begin counting, close your register to new transactions if you are doing a closing count. Additionally, make sure no one else has access to the drawer while you are counting — interruptions are the leading cause of counting errors.
Step 1: Remove the Drawer from the Register
If possible, remove the cash drawer tray from the register and place it on a flat surface. Counting directly from a mounted register is possible but more prone to errors, since bills can shift and coins can roll.
Furthermore, removing the drawer allows you to work comfortably and keeps the counting process separate from the register terminal, which reduces the risk of accidental key presses or transaction records being created during the count.
Step 2: Sort All Bills by Denomination
Start with the bills. Remove all notes from the drawer and sort them into separate piles by denomination — all $100 bills together, all $50 bills together, and so on. Face all bills in the same direction and make sure none are stuck together.
While sorting, set aside any bills that seem damaged, torn, or unusually worn — these may need to be flagged for your manager or deposited as damaged currency.
Step 3: Count Each Bill Denomination
Starting with your highest-value bills, count each pile carefully. Count them twice if the total is large or if the amount matters for a closing reconciliation. Record the quantity of each denomination as you go.
Here is a simple formula for calculating the value of each denomination group:
| Denomination | Quantity Counted | Total Value |
|---|---|---|
| $100 | × quantity | = $____ |
| $50 | × quantity | = $____ |
| $20 | × quantity | = $____ |
| $10 | × quantity | = $____ |
| $5 | × quantity | = $____ |
| $1 | × quantity | = $____ |
Add all the bill totals together to get your total bill value. Our Cash Drawer Count Sheet handles this calculation automatically once you enter the quantities.
Step 4: Count All Coins by Denomination
After finishing the bills, move on to coins. Sort coins by denomination, then count each group. For large quantities of the same coin, group them into stacks of ten or use coin rolls to speed up the process.
Standard US coin values for reference:
| Coin | Value Each | 10 Coins | Roll (standard) |
|---|---|---|---|
| Penny | $0.01 | $0.10 | $0.50 (50 coins) |
| Nickel | $0.05 | $0.50 | $2.00 (40 coins) |
| Dime | $0.10 | $1.00 | $5.00 (50 coins) |
| Quarter | $0.25 | $2.50 | $10.00 (40 coins) |
Step 5: Calculate Your Total and Compare
Add your total bill value and total coin value together to get your full drawer total. Then compare this to your expected amount.
For an opening count, your total should match your standard opening float — for example, $200.
For a closing count, your expected total is calculated as follows:
Opening float + Total sales collected in cash − Cash refunds given = Expected closing balance
If your actual count matches the expected balance, your drawer is balanced. If there is a difference — either over or short — you have a discrepancy that needs to be recorded and investigated.
Step 6: Record Your Count and Any Discrepancy
Whether your drawer balances or not, always record your count in writing. Our free Cash Drawer Count Sheet records every denomination, calculates your total, and clearly shows any over or short amount. You can then export this record as a PDF for your files.
Consistent recordkeeping is important because it creates a verifiable history of every cash count. Consequently, if a pattern of discrepancies emerges over time, you will have the documentation needed to investigate.
How to Handle a Cash Discrepancy
Small discrepancies — up to a dollar or two — are common and usually result from rounding errors or miscounted change. Most businesses have a threshold below which a small discrepancy is noted but not escalated.
Larger discrepancies — particularly those that occur repeatedly or on a single cashier’s shift — require a more thorough review. Steps to follow include:
- Recount the drawer carefully from scratch.
- Review the transaction log for the shift in question.
- Check for any voids, refunds, or manual overrides that may account for the difference.
- Report the discrepancy to your manager with your count sheet as documentation.